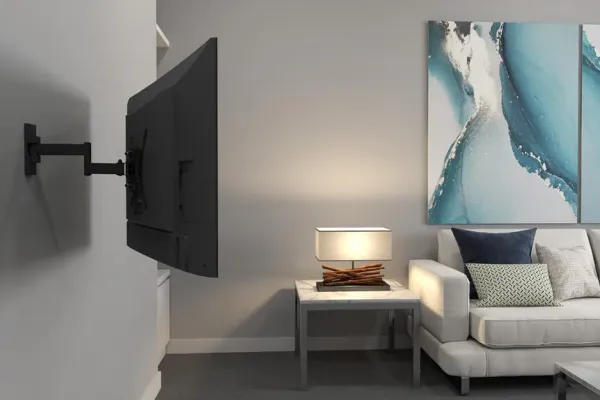
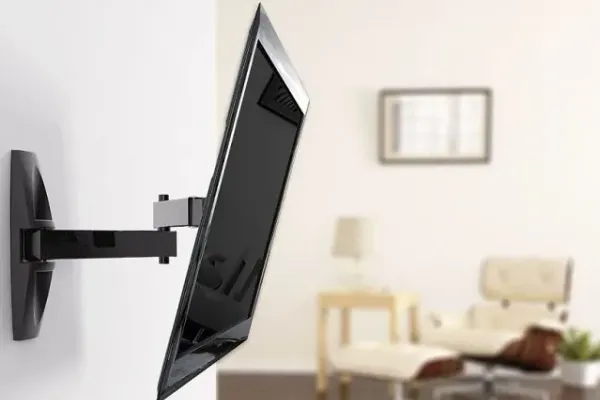
How to Mount a TV on Drywall with Studs (Step-by-Step)
Thinking of mounting your TV yourself? This DIY guide is for any homeowner who wants to securely install a flat-screen TV on drywall with studs. With the right tools, some preparation, and this step-by-step guide, you’ll achieve a clean, safe, and professional-looking result. Prefer to let pros handle it? We’ve got you covered too.
What you’ll need to mount a TV on drywall
Before you begin, gather the essential tools. Investing in quality tools not only ensures safety but also saves you time and frustration during the process. These tools are commonly used by professionals in Alpharetta and nationwide:
- ✅ Stud finder - Essential for accurately detecting wood studs behind drywall
- ✅ TV wall mount bracket - Make sure it's VESA-compatible with your TV size and weight
- ✅ Power drill + drill bits - Needed to drill pilot holes through drywall and into studs
- ✅ Level tool - Keep your TV perfectly straight
- ✅ Lag bolts and anchors - Often included with mounts, but always check for quality
- ✅ Socket wrench set - For tightening lag bolts securely
- ✅ Tape measure - To help measure and align the TV placement
- ✅ Cable concealer kit - Keeps things neat and hides messy wires
🔧 Bonus tip: Keep a vacuum nearby. Drilling into drywall creates fine dust that can scatter quickly.

Step-by-step DIY TV mounting instructions
Mounting your TV to drywall with studs is a straightforward process - but it needs to be done with care. Here’s a more detailed breakdown:
1. Locate studs behind the wall
Most homes are framed with wooden studs spaced 16 or 24 inches apart. Use your stud finder and mark the edges of each stud. Ideally, you’ll use two studs to anchor the mount for added strength.
2. Decide TV height and position
A good rule of thumb is that the center of the TV should be at eye level when seated - typically about 42-48 inches from the floor. Mark this center point with painter’s tape.
3. Align and mark the wall bracket holes
Hold the wall plate against the wall. Use a pencil to mark where the screws will go (through the center of the studs). Use your level to ensure the bracket is straight.
4. Drill pilot holes into studs
Start with a smaller drill bit (3/16") to create pilot holes. This helps prevent wood splitting and makes it easier to insert lag bolts.
5. Secure wall bracket with lag bolts
Use your socket wrench to drive lag bolts into the pilot holes. Don’t overtighten - you want them snug, but not stripping the stud.
6. Attach bracket arms to your TV
Locate the VESA pattern on the back of your TV. Secure the mount arms using the included screws. Be sure to check that all arms are aligned evenly.
7. Mount the TV to the wall plate
Have a friend assist you. Carefully lift the TV and attach it to the wall plate. Most mounts will "click" into place or have safety screws to lock it in.
8. Hide your cables
Use a raceway or in-wall cable kit to route HDMI, power, and other cords. This provides a clean look and helps with childproofing and safety.
9. Final check
Gently pull on the TV to ensure it’s secure. Tilt and adjust if you have a full-motion mount. Confirm that it’s level.
✅ DIY pro tip: Always double-check that the bolts hit the stud - drywall anchors alone won't support most TVs.

Top-rated TV mounts for drywall and stud installation
Choosing the right mount can make or break your setup. Here are three high-quality options used by professionals and DIYers alike:
- 🛠 ECHOGEAR full motion mount - Excellent for viewing-angle flexibility in large living rooms
- 🛠 Mounting Dream tilt mount - Great for above-fireplace or bedroom setups
- 🛠 PERLESMITH fixed mount - Budget-friendly and perfect for flat, eye-level installs

Why mounting into studs is non-negotiable
Even if your TV seems lightweight, drywall simply isn't designed to support it. Studs provide:
- ✅ Structural strength to hold the weight of the mount and the TV
- ✅ Vibration resistance, especially near doors or stairs
- ✅ Peace of mind, knowing your TV won’t crash to the ground
🔒 Avoid plastic drywall anchors unless you’re installing a very small screen (under 20").

Common DIY mistakes (and how to avoid them)
Don’t fall into these traps:
- ❌ Using drywall anchors instead of lag bolts into studs
- ❌ Mounting too high above eye level
- ❌ Not checking that the bracket is level
- ❌ Skipping cable concealment
- ❌ Not having help lifting the TV - risking both damage and injury
✔️ Take your time, follow the instructions, and watch video tutorials if needed.

Prefer a pro? Let us mount it for you
We help Alpharetta homeowners every day with:
- Professional in-home TV mounting
- Over-the-fireplace installs
- Full motion, tilt, or flush mounts
- Hidden-wire solutions and cord concealment
- Secure mounting on drywall, brick, or concrete
Don’t risk it - book your appointment with Alpharetta’s trusted TV-mounting team today. Fast, affordable, and clean.

Mounting a TV on drywall comes down to one rule: hit the studs. Drywall alone won’t hold a flat-screen over 32 inches, so the whole job is about finding the wood framing behind the wall and anchoring into it with lag bolts. The tools, the nine steps, and the mount picks above cover the how; the quick reference and FAQ below cover the decisions people get wrong most often. For the full multi-wall protocol (brick, plaster, metal studs, fireplace) see our complete how to mount a TV guide, and to choose the bracket itself, our best TV wall mount guide.
Drywall anchor quick reference
| TV size | Anchor into studs | Drywall-only OK? |
|---|---|---|
| Under 32” | 2 lag bolts or rated toggles | Sometimes (rated anchors) |
| 32-55” | 3/8” x 3” lag bolts, 2 studs | No |
| 55-75” | 3/8” x 3” lag bolts, 2-3 studs | No |
| 75”+ | lag bolts, 3 studs + plywood backer | No |
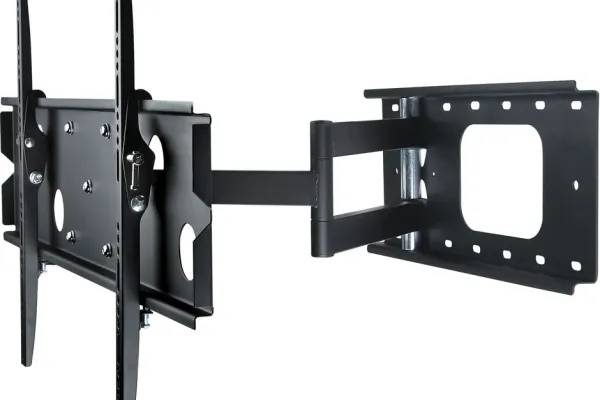
If you can’t hit two studs where you want the TV, a full-motion mount that spans a wider stud range (or shifting the position a few inches) beats trusting drywall anchors. Not sure drywall can take it at all? See is it safe to mount a TV on drywall. Renting? Our apartment mounting guide covers deposit-safe stud mounting, and once it’s up, you can hide the wires in the wall.
Frequently asked questions {#frequently-asked-questions}
Can you mount a TV on drywall without hitting a stud?
Only for small TVs (under 32 inches), and only with heavy-duty rated anchors like SnapToggles, using at least four of them. For anything larger you must anchor into the wood studs. Drywall and plastic anchors cannot hold the cantilever load of a bigger TV and will pull out, often taking a chunk of wall with them.
What size lag bolts do I need to mount a TV on drywall?
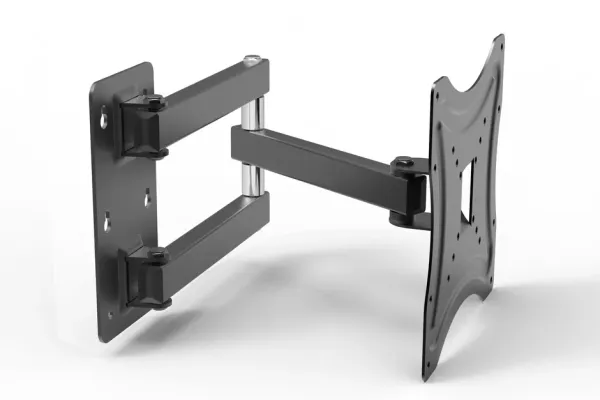
For most installs, 3/8-inch by 3-inch Grade 5 lag bolts driven into the studs. Pre-drill a 1/4-inch pilot hole about 2.5 inches deep so the bolt threads into solid wood without splitting the stud. Two studs is the minimum; use three for full-motion mounts or TVs over 65 inches.
How do I find the studs behind drywall?
Run an electronic stud finder horizontally at the mount height and mark both edges of each stud, then mark the center. Studs are usually 16 or 24 inches apart. Confirm with a second pass; on older plaster-over-drywall walls, a strong magnet can locate the drywall screws that mark the stud lines.
Will mounting a TV damage my drywall?
Not if you anchor into the studs. The four lag-bolt holes are small and patch with spackle in minutes. Damage happens when people use plastic drywall anchors for a large TV: the load walks the anchors out and tears the paper face. Anchored into a stud, the framing carries the weight, not the drywall.
Do I need a professional to mount a TV on drywall?
A fixed mount on drywall with wood studs is a realistic DIY job if you own a stud finder, drill, level, and a socket wrench. Step up to a pro when the TV is over $1,000 or 60 lbs, the wall is brick or plaster, or it’s going above a fireplace - the cost of a wrong anchor (a fallen TV plus wall repair) dwarfs the install fee.
Want it done for you?
Not confident doing it yourself? Let our Alpharetta-based experts mount your TV with precision and hidden-wire solutions. Schedule your appointment today for safe, clean, and stylish results!